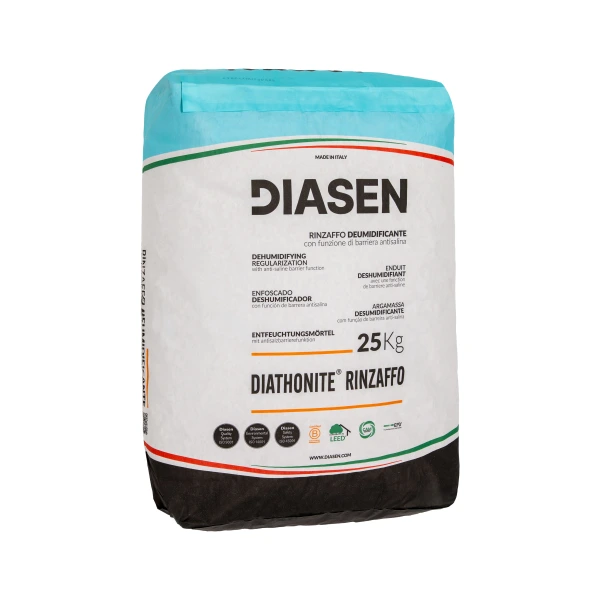
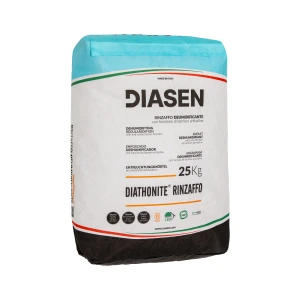
Diasen Diathonite Regularisation
Product Overview
Main purpose
To prepare and mechanically strengthen walls and protect against severe salt penetration and salt deposits (efflorescence).
Use it on
Internal or external masonry walls where rising damp and salt deposits occur. Use prior to other Diathonite plasters being applied.
Overview
Diasen Diathonite Regularization is a lime based breathable salt resistant, restoration plaster with excellent strength and robustness. It can be used on masonry walls prior to Diathonite insulation plaster being applied. Its high strength means it can be used for stabilising damaged walls and for levelling prior to Calsitherm Climate Board or Gutex Thermoroom insulation systems being applied. Used internally and externally, Diathonite Regularization is very workable and can be sprayed-on with a plastering machine or applied by hand with a trowel.
Where to use it
Before you start your project, it is essential to investigate and fix any existing damp or moisture related issues in the wall; please see our installation guide for full details.
Diasen's Diathonite Regularization should be applied directly onto the brick, block or stone of internal, external or partially underground masonry walls. All existing plasters, paint or surface finishes must be removed first. It is designed specifically for use prior to the application of Diathonite Deumix+, Evolution or Thermactive plasters.
For optimal performance and longevity of any internal wall insulation system, it is crucial to evaluate the suitability of the wall and rectify any problems before installation begins. Please read our guide: “How to prepare traditional solid walls for IWI Installation” to ensure you achieve the best results.
What it does
Diasen Diathonite Regularization is used as a breathable salt barrier on walls with damp and salt penetration issues. It is typically used before Diathonite Deumix+, Diathonite Evolution or Diathonite Thermactive is applied to maintain a highly breathable construction, regulate moisture and prevent salt deposits.
It can also be used as a higher-adhesion base coat for Diathonite insulation plasters on problematic walls that have changeable or varying levels of moisture at different points across the surface.
It can be painted directly with a natural breathable paint, if no other plaster is to be applied.
Diathonite Regularization can be used to level a wall before other breathable insulating systems like Calsitherm Climate Board, Gutex Thermoroom or Gutex Thermowall are to be used.
Its high strength means Regularization is perfect for stabilising and consolidating any damaged parts of the wall prior to applying other Diathonite plasters.
One bag of this breathable salt barrier will cover approx. 2m² at 10mm thickness. The maximum thickness that can be applied is 30mm.
How it works
Diathonite Regularization is macroporous (meaning large pores). This type of structure stops the movement of water-soluble salts into the plaster.
The restoration plaster is lime-based and made with natural hydraulic lime NHL5 which is the strongest type of hydraulic lime used in Diathonite plasters. When combined with other Diathonite plasters it provides excellent moisture balance and breathability to walls.
Why we love it
Diasen Diathonite Regularization is easy to mix and provides a consistent mixture with excellent workability. It can be spray applied though a plastering machine or trowel applied by hand.
It contains only natural materials and qualifies for LEED points, which ensures it can be used in projects with strict environmental requirements. It improves the fire safety of the building as it is non-combustible and does not emit smoke.
Builders and DIY enthusiasts can easily install Diathonite Regularisation with no special training.
Features
- High mechanical strength
- Salt Barrier
- Just add water
- Compatibility with other products
- Fireproof / non-combustible
- Breathable (vapour open)
Benefits
- A lime based breathable strengthening plaster to restore and level walls before plastering over.
- Protection against severe salt penetration and salt deposits.
- Can be combined with other Diathonite plasters or breathable board insulation systems.
- Does not burn or smoke so improves fire safety of the building.
- Easy to mix with excellent workability and adhesion. Can be hand applied or sprayed-on with a machine.
Questions
There are currently no questions and answers published for this product
Technical Details
Key Technical Data
Installation Guide
Find an installerBefore You Start
Before installing any internal wall insulation, it is essential to investigate and fix any existing damp or moisture related issues in the wall. Even though our internal wall systems are breathable and provide optimal protection against condensation, persistent damp issues must be resolved first. A wet wall is a cold wall, so preparation to remove or reduce external sources of moisture is key to achieving optimum results.
Once damp issues have been resolved, the wall should be allowed to dry thoroughly and re-assessed for suitability of internal wall insulation.
Any existing gypsum plaster on the internal side of the wall should be removed first to reveal the stone or masonry underneath. This ensures the wall will be fully breathable and allows the Diathonite to work to its full potential. It also provides a reliable key for maximum adhesion of the Diathonite to the wall.
These are the main considerations before commencing any work:
- Is there evidence of moisture in the walls?
- Is there any evidence of condensation, fungus or mould growth on the internal walls?
- Is there a functioning damp proof course (DPC)?
- Is there sufficient ventilation in the property?
- Is the external ground level higher than the floor level inside?
- Are there any structural defects in the external walls?
- Is guttering, flashings and external pipework in good condition?
- Is the external render, pointing or cladding in good condition and providing adequate weather protection?
- Is the external finish suitable for the severity of wind driven rain exposure?
- Are the timber joists embedded in external walls free from infestation and rot?
- Has the building ever been flooded?
- If you chose not to remove existing plaster on the wall, is this plaster fully compatible with the insulation system being used? (Ideally, it would need to be lime-based, any existing gypsum plaster on the internal side of the wall should be removed first)
How to Install
The wall must be stable, free of debris and dry. The surface temperature must be between +5°C and +35°C. Strip any old paints or plasters back to the original brick or stone wall and clean off any salt deposits. Temporarily cover door and window frames and thresholds before installation.
You need 4-5 litres of clean water per bag of Diathonite Regularization. The amount of water is indicative and may vary depending on the circumstances of your application. Add the powder gradually to the water and mix with a concrete mixer or drill mixer at low speed until you get a combined mixture without lumps. Never add anti-frost products, cement or aggregates to the mix.
Depending on the absorption of the masonry wall and the temperature, the surface may need to be misted with water first to ensure any potential rapid absorption will not compromise the adhesion of Diathonite Regularization or cause any cracks (consult our technical team for guidance if you are unsure).


Diathonite Regularization can be applied by trowel or through a plastering machine. Each coat should be completely dry before the next coat is applied. Drying time is 5mm thickness per day (at 20°C and 40% relative humidity). This may vary significantly depending on temperature and relative humidity. The first coat should be 3-5mm to regulate the water absorption of the surface and create a good bonding key for subsequent layers. Once the first coat is dry, apply one or more additional coat of 5-30mm thick until a total thickness of 10-30mm is achieved.
Smooth the surface of the last layer, while it is still tacky, with a sponge or trowel to create a level surface. If pressing your finger on to the surface leaves a fingerprint, the surface is tacky enough to be smoothed with the sponge or trowel.
Diathonite Regularization must not dry too quickly. For that reason, especially if the weather is warm, we recommend covering the fresh plaster with a reusable polythene sheet for approximately 24 hours after application.
Once the required thickness of Diathonite Regularization is achieved and it has fully dried, apply the Diathonite Deumix+, Diathonite Evolution or Diathonite Thermactive as required.
Hints and Tips
All application/yield figures quoted are based on application to a smooth level surface.
Do not apply at temperature lower than +5°C and higher than +35°C.
If used externally under warm weather conditions, apply the product during the cooler hours of the day, away from direct sun.
If used externally, do not apply when rain or frost is expected in the following 2 days.


