Inventer Aviant
Product Overview
Main purpose
Automatic energy efficient and quiet extraction of stale/humid air from inside of a building to the exterior.
Use it on
External walls (up to 745mm thick) or ceilings in any room where high moisture levels may occur, typically in bathrooms, kitchens, and utility rooms. It is suitable for block, concrete, stone, timber frame and brick constructions. On a ceiling, additional ducting to the external wall is required.
Overview
The Aviant air extraction fan is a programmable, extractor fan perfect for rooms where high levels of moisture can arise. It has unique built-in humidity, light and odour sensors which automatically activate to regulate the air quality quickly, quietly and energy efficiently. The fan can be controlled remotely via the Inventer mobile app or directly with the built-in touch panel on the device.
Where to use it
The Aviant extraction fan is typically used in bathrooms, washrooms, kitchens and utility/laundry rooms or in any room where humidity levels can become elevated, or air quality can degrade (e.g. cooking smells etc.).
It can be installed into a 115mm hole in an external wall up to 745mm thick (or up to 495mm thick if you choose the version with a shorter wall sleeve length). When installed in a ceiling, additional ducting will be required to ensure the exhaust air can safely exit a nearby external wall. The fan must be positioned on the external wall, so its centre is at least 250mm away from any windows and at least 250mm away from roof eaves. The interior side of the fan must not be covered or obstructed by furniture, fixtures or fittings.
What it does
With unique multifunctional sensors, The Inventer Aviant extraction fan quickly and energy efficiently removes humid and stale air from a room. This ensures constant high levels of indoor air quality. The extracted air exits the building through an exhaust that seals itself when the fan is not being used.
It can be programmed to automatically activate when a specific humidity level is reached or when the built-in odour sensor detects higher than normal levels of gases such as hydrogen, methane, isobutane and ethanol vapour. The programming also has an option for the fan to activate when a light is turned on, thanks to its built-in light sensor.
Although the fan has a powerful extraction capability (Extraction air volume flow of 95m³/h), it has a very low noise level of only 17-20db (A); this is equivalent to whispering from 1.5m away.
Why we love it
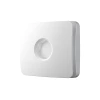
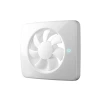
The Aviant extraction fan is a discrete stylish modern looking device that can efficiently improve the indoor air quality. This is thanks to its specially designed closable flap in the wall sleeve which minimizes air leakage, super quiet 17-20db noise level and modern internal cover that blends into its surroundings and hides the fan blades.
It has three sensors, one for humidity, one for odours and one for light. Settings can be controlled through the device’s touch panel or the Inventer mobile app on your phone. The fan speed settings (0, 25, 50, 75, 100%) can be controlled via the touch panel and sensor and sensitivity settings are controlled through the Inventer mobile app.
How it works
The programmable, extractor fan uses its three unique multifunctional sensors to constantly monitor and react to changes in humidity, air quality and light. Humid or stale air is extracted automatically to create a pleasant indoor air quality.
The light sensor allows the fan to activate when a light is turned on in the room, the odour sensor detects gases such as hydrogen, methane, isobutane, and ethanol vapour and removes these once triggered. The humidity sensor is activated when the level reaches the programmed relative humidity level. Once the room has reached the desired air quality, as defined via the touch panel or Inventer mobile app, the fan will stop running and seal itself with the automatic closable flap in the wall sleeve.
Features
- Three built-in sensors: Humidity, Odour and Light
- Programmable Humidity Sensor
- Odour Sensor detects excess hydrogen, methane, isobutane, and ethanol vapour
- Light Sensor can be programmed to activate fan when light comes on
- Compact and stylish with hidden touch panel controls
- Closed flap in the wall sleeve which opens automatically when fan is working
- Full control via Inventer app on your mobile phone
- 5-year manufacturer’s warranty
- Energy-efficient 2-5W fan
Benefits
- Fully automatic operation: regulates humidity quickly and effectively to maintain healthy Indoor air quality, remove unpleasant odours and minimise condensation.
- Removes respiratory illness triggers such as mould and mildew spores that thrive in a high humidity, poorly ventilated environment.
- Uses only 2–5 Watts with an average yearly running cost of €5.50 (based on typical 2020 energy costs). This lowers your carbon footprint and improves indoor air quality.
- The closed flap in the wall sleeve prevents draughts and noise from entering the building
- Easy to set up, program and control remotely via the Inventer mobile app. Great for when installed in a ceiling or out of reach.
Questions
There are currently no questions and answers published for this product
Technical Details
Key Technical Data
Installation Guide
How to install
Turn the power off during electrical works. All electrical connections must be carried out by a qualified professional. Seek professional advice for planning and installation of all electrical works.
When installed on an external wall, a 115mm wide hole will be required. The hole should have a 2 degree fall to the outside. In walls made from brick, concrete or stone this should be cut with a 115mm masonry core drill. The best position for the fan on the wall should be worked out in advance before drilling. The exhaust (external end) of the fan must be positioned so the centre of the fan will be at least 250mm from the edge of a window and at least 250mm from the eaves of the roof. The internal end of the fan should be situated away from radiators and heat sources and should not be obstructed by furniture, fixtures or fittings.
Once a suitable hole has been cut, the wall-sleeve that connects the internal end of the fan to the external end should be cut so it is 10mm longer than the thickness of the wall. The aim is to have the wall-sleeve protrude by at least 10mm at the exterior end outside.
Hint: You may find it easier to judge the length required by fitting the pipe into the hole and aligning the interior end flush with the wall (consider any internal plaster/finishes to be added later and adjust as necessary). Then make sure the wall-sleeve has a 2° slope towards the exterior. You may need to use the supplied wedges to align and secure the wall-sleeve at the correct 2° incline. From the exterior, draw round the protruding pipe with a pen or pencil to mark the wall level on the sleeve. You could use a spacer or your finger between the pen and the wall to draw the line 10mm away from the wall surface, or you can just mark the wall line, remove the sleeve from the wall and draw a second line on the sleeve 10mm further along. Once you have a suitable line to mark the thickness of the wall including an extra 10mm, cut the sleeve and reinsert it into the wall replacing the wedges as needed.
The wall sleeve should be a snug fit in the hole and sealed airtight at both ends. Seal gaps of up to 6mm between the wall-sleeve and wall with Pro Clima Orcon F airtight sealant. For bigger gaps of up to 20mm, use Aerosana Visconn Fibre. If any gaps exceed 20mm, fill with mortar, leave it to set then seal all around with Orcon F or Aerosana Visconn Fibre.
If the wall has no plaster or render on it and will be plastered or rendered later, a pair of 90-120mm Pro Clima Roflex Solido airtight grommets can be used to seal either end of wall-sleeve to the wall. This grommet is stuck to the surrounding masonry then plastered over to finish.
The external grill is the next component to be installed, this should be fixed to the outer wall using the Philips screws and plugs provided. The external grill should be oriented/rotated so that the drip tray is at the bottom. The 2° incline in the wall sleeve will allow any condensation to run out onto the drip tray and fall to the ground. The smart design of the external grill ensures any condensed water drops will not drip onto the external façade and cause staining over time.
Next, the internal fan unit should be fixed to the interior side of the wall. The cover can then be placed on the front of this; it is magnetically attached. This cover disguises the touch panel and fan blades and completes the modern stylish look.


